
The Problem with Modern Cookware: A Disposable Crisis
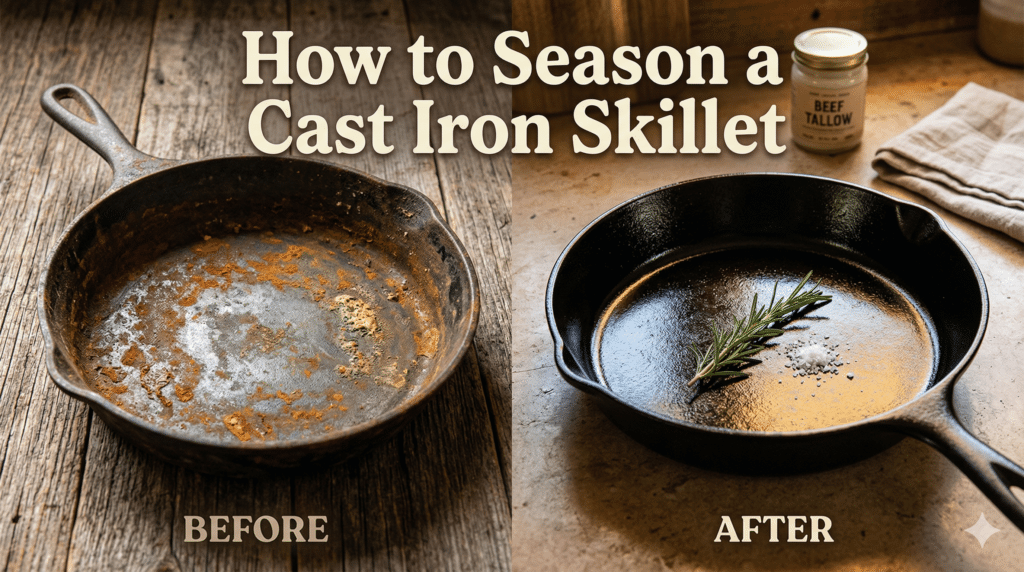
If you walk into a modern department store, you are surrounded by “non-stick” skillets that claim to make cooking easy. However, these pans are often coated in perfluorinated chemicals (PFAS) that flake off into your food and eventually end up in a landfill. In contrast, learning how to season a cast iron skillet is an old-school, sustainable solution. This “disposable culture” is the antithesis of the Bathrobe Patriot lifestyle.
In contrast, a good piece of cast iron is a rugged, carbon-steel-adjacent heirloom that can last for generations. While modern pans lose their “slickness” within a year, a cast iron skillet actually improves with age. The only catch? You must know how to season a cast iron skillet properly to maintain its legendary performance. For the everyday patriot, this isn’t just about cooking; it is about self-reliance and reclaiming the kitchen from industrial shortcuts. Therefore, mastering this skill is as essential as knowing how to sharpen a knife or choosing the right cutlery for the job.
What is “Seasoning” Anyway? (The Science of Polymerization)
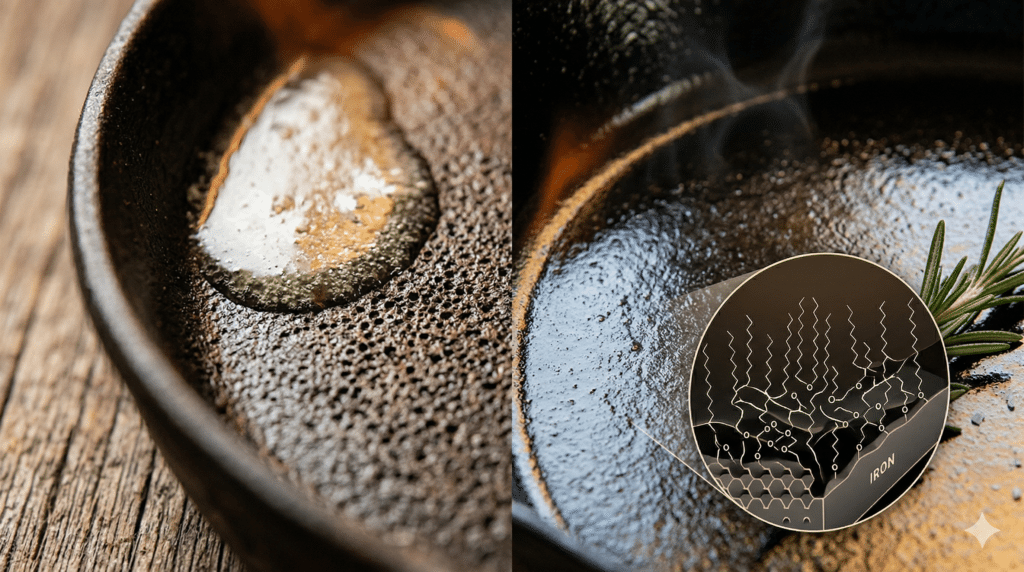
Before we dive into the step-by-step process, we need to understand the science behind the surface. Many beginners mistake “seasoning” for flavor or a simple coating of oil. In reality, seasoning is polymerization.
Specifically, when a liquid fat is heated past its smoke point in the presence of iron and oxygen, it undergoes a chemical reaction. The fat molecules cross-link and transform into a hard, plastic-like solid that bonds to the metal. Consequently, this natural coating becomes the original non-stick surface, created long before Teflon was ever invented.
If you are following our MAHA Guidelines (Make America Healthy Again), you already know we are ditching industrial seed oils. Fortunately, you can season your pan with the same traditional fats our grandparents used. While many “experts” suggest flaxseed or soybean oil, we prioritize biological compatibility and stability. Using animal fats like beef tallow or lard connects your cooking back to a time of purity and strength.
Choosing the Best Fat: Tallow, Lard, or Oil?
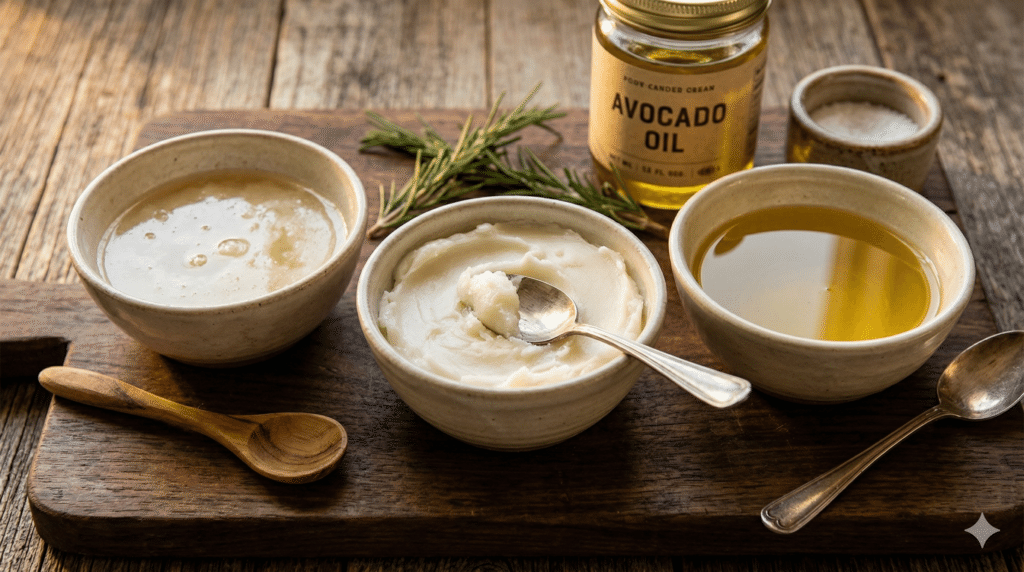
The foundation of your seasoning depends entirely on the fat you choose. Not all fats are created equal when it comes to heat stability and bonding.
- Beef Tallow: Our top choice. It is stable, historically accurate, and creates a durable finish.
- Lard: A classic option, though ensure it is non-hydrogenated and sourced from pasture-raised pigs if possible.
- Avocado Oil: If you prefer a plant-based option, avocado oil has a high smoke point (approx. 520°F), making it excellent for creating a tough layer.
- Avoid: Butter or unrefined coconut oil. These contain solids (proteins or sugars) that will burn and flake rather than polymerize.
Step-by-Step: How to Season a Cast Iron Skillet
Restoring a rusty “barn find” or protecting a brand-new Lodge skillet is simple if you follow these precise steps. Don’t rush the process; patience is the secret ingredient to a glass-smooth finish.
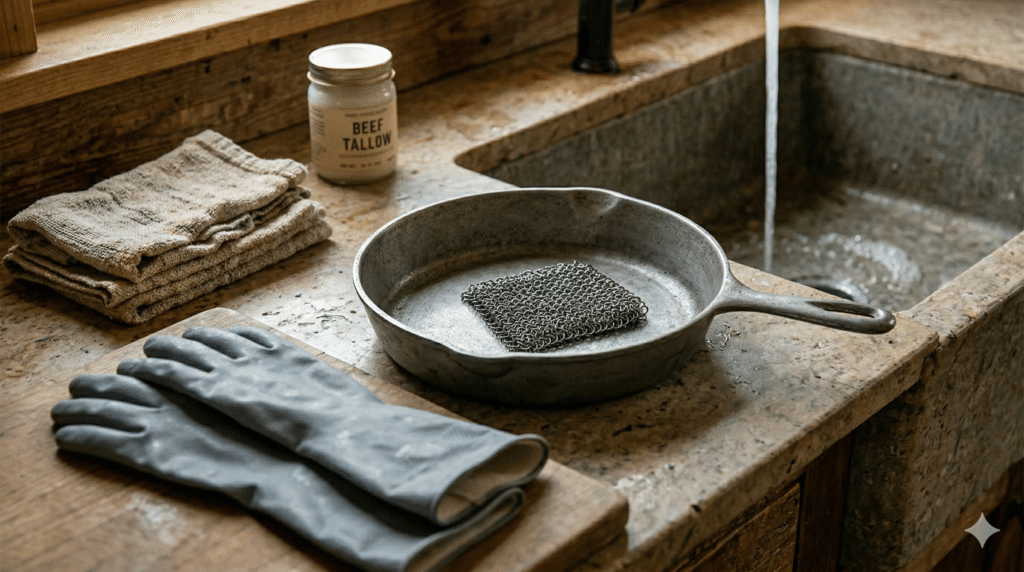
1. Scrub It Down to the Base
First, you need a clean, bare-metal base. If the pan is brand new, wash it with warm, soapy water to remove the factory-applied wax or “pre-seasoning” that may contain inferior oils. Although we usually say “no soap” on cast iron once it’s seasoned, this is the one exception. Use a stiff brush or a chainmail scrubber to remove any grit. Afterward, dry it completely with a towel, then place it on a warm stovetop for five minutes to evaporate any microscopic moisture.
2. Apply the Fat with Precision
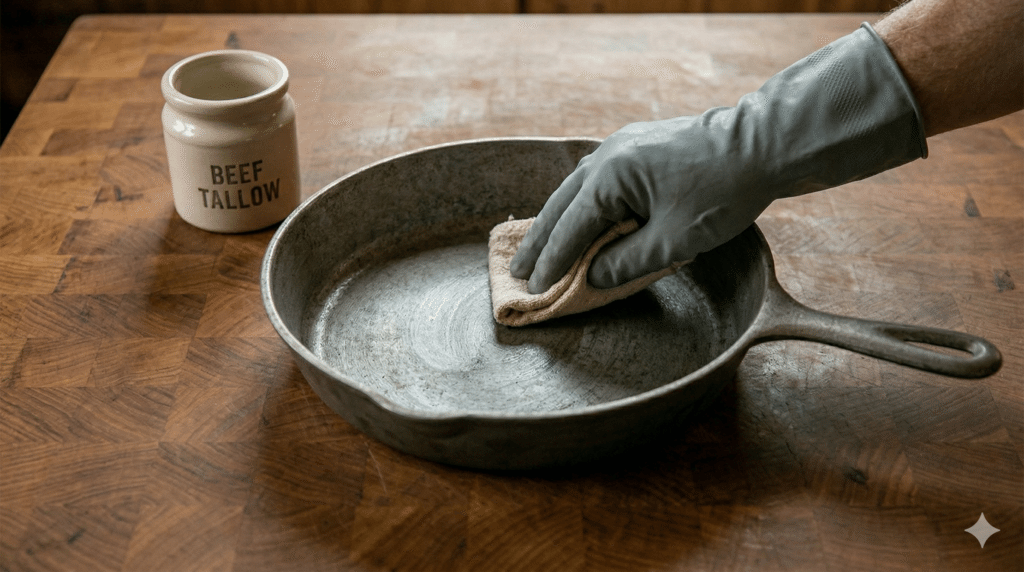
Next, apply a very thin layer of your chosen fat. Specifically, we recommend using beef tallow for its high saturated fat content. Rub it all over the pan, including the handle, the exterior, and the bottom. However, do not leave it dripping wet. This is where most people fail.
Pro-Tip: Wipe the oil off as if you made a mistake and are trying to remove it entirely. You want a microscopically thin layer. If the layer is too thick, it will become sticky and gummy rather than hard and slick.
3. The Heat Treatment (The Oven Method)
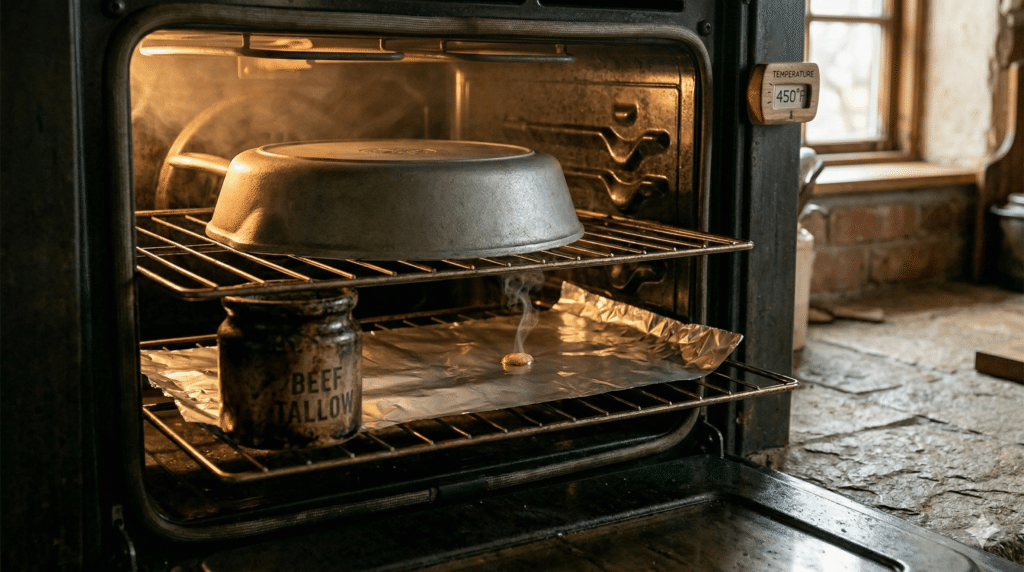
Now, place the skillet upside down in your oven. Placing it upside down ensures that any excess oil (if you applied too much) drips out rather than pooling in the bottom of the pan. Put a sheet of aluminum foil or a baking tray on the rack below it to catch any drips.
Bake the skillet at 450°F (230°C) for one hour. This high heat is the secret to how to season a cast iron skillet effectively, as it pushes the fat past its smoke point, locking the polymerization into the pores of the metal.
4. Cool and Repeat for Longevity
Finally, turn off the oven and let the pan cool inside. Do not rush this by dunking it in water, as thermal shock can crack the iron. Furthermore, for the best results, you should repeat this oil-and-bake process 3 to 4 times. Each layer builds upon the last, creating a deep, black patina that is virtually indestructible.
Cooking: The Ultimate Maintenance Routine
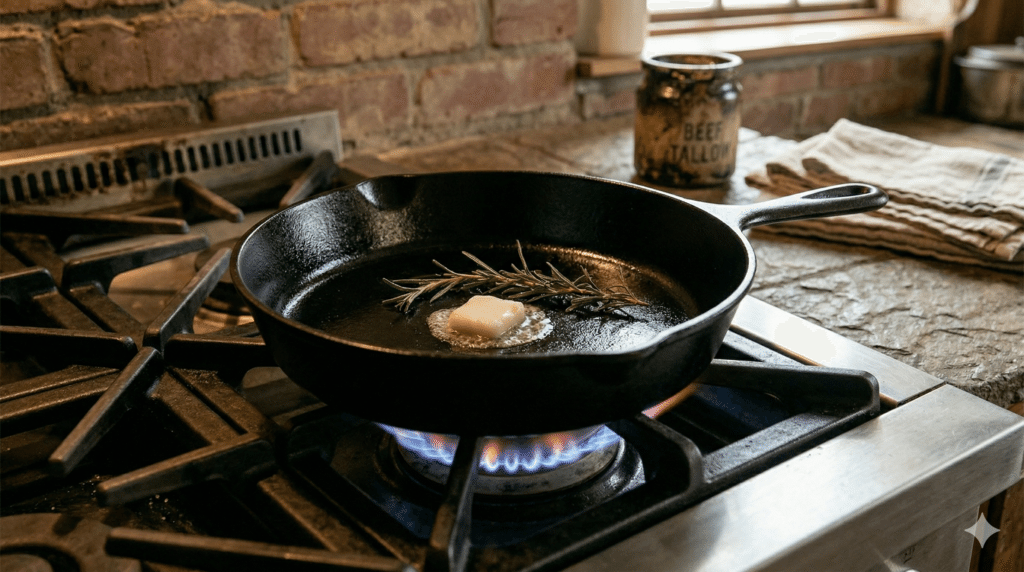
The best way to maintain your seasoning is simply to use the pan. For instance, searing a steak is one of the best things you can do for the iron. The high heat combined with the natural animal fats from the meat will naturally reinforce the seasoning layer every time you cook.
In addition, proper tools matter. Avoid plastic spatulas that can melt or leach chemicals. Instead, use metal or wood. A flat-edged metal spatula is actually beneficial; it acts as a “micro-planer,” smoothing out the seasoning every time you scrape the bottom of the pan. This is a practice frequently cited by experts at the Cast Iron Collector, a leading resource for vintage iron restoration.
Common Myths and Mistakes
To ensure your pan stays in peak condition, let’s dispel some common myths:
- Myth: You can’t use soap. Fact: Modern dish soap is gentle. A quick wash with a small amount of soap won’t hurt a well-polymerized seasoning. Just avoid the dishwasher at all costs.
- Myth: Cast iron heats evenly. Fact: Cast iron is actually a poor conductor of heat and develops “hot spots.” The key is to pre-heat the pan slowly on low-medium heat for 5-10 minutes before adding food.
- Myth: Acidic foods ruin the pan. Fact: You can cook a tomato sauce for 30 minutes without issue. However, long, multi-hour simmers may strip some seasoning and give the food a metallic taste.
Frequently Asked Questions (FAQ)
Q: How do I know if my pan needs re-seasoning? A: If food starts sticking excessively, if you see rust spots, or if the pan looks dull and grey rather than shiny and black, it’s time for a maintenance layer.
Q: Can I use olive oil to season? A: You can, but it is not ideal. Extra virgin olive oil has a low smoke point and contains impurities that can lead to a weaker, flakier seasoning.
Q: Why is my cast iron skillet sticky after seasoning? A: This happens when you use too much oil. To fix it, place the pan back in the oven at 450°F for another hour to complete the polymerization of the excess fat.
Q: Is rusted cast iron trash? A: Never. Unless the pan is cracked or severely warped, rust can be scrubbed away with steel wool or a vinegar soak, and the pan can be seasoned back to life.
Conclusion: A Declaration of Independence
Learning how to season a cast iron skillet is a declaration of independence from a disposable, chemical-laden culture. It takes a little effort and a bit of “elbow grease,” but the reward is a tool that your grandchildren could be cooking with one day. It represents a commitment to quality, health, and the endurance of tradition.
So, grab some tallow, crank up the oven, and get to work. Your future self—and your future steaks—will thank you. For more food tips check out The Kitchen.
Eric Webber is the founder of Bathrobe Patriot, a lifestyle brand centered on bourbon, cigars, and common sense. As an ISSA-certified trainer and former restaurant owner with 20 years of experience, he values quality over quantity and backbone over political correctness. Currently, Eric lives in Safety Harbor, Florida, where he advocates for a life of balance, discipline, and the occasional slow pour. Consequently, his mission is to provide you with the unfiltered truth about the gear, spirits, and culture that define the American spirit.